
How to set up your drums: Throne, Snare, Hi Hat, and Kick Pedals
This page is a reference for setting up the most critical part of your kit. However, it does not include information about setting up your toms or cymbals. These recommendations apply to both acoustic and electronic set-ups.
On this page we’re going to address the throne, the snare drum, and your pedals (kick and hi hat.) This is the foundation of your set up, so it is critical that you get this part right. It’s probably a good idea if your kick drum is attached to the kick pedal, because we need to make sure the snare drum will fit in our set up with the kick drum. If you are playing an acoustic kit, your hi hat pedal will be connected to the hi hat stand–however, the images below show the pedal only.
Sit on the throne with your feet on the pedals, with your feet fairly far apart. When placing your pedals, consider that you’ll need to fit the snare drum between your knees, and most snare drums are 14” across. And then you’ll want at least an inch or two of space between the drum and your knees on either side, so that your legs won’t bump it accidentally as they move up and down.
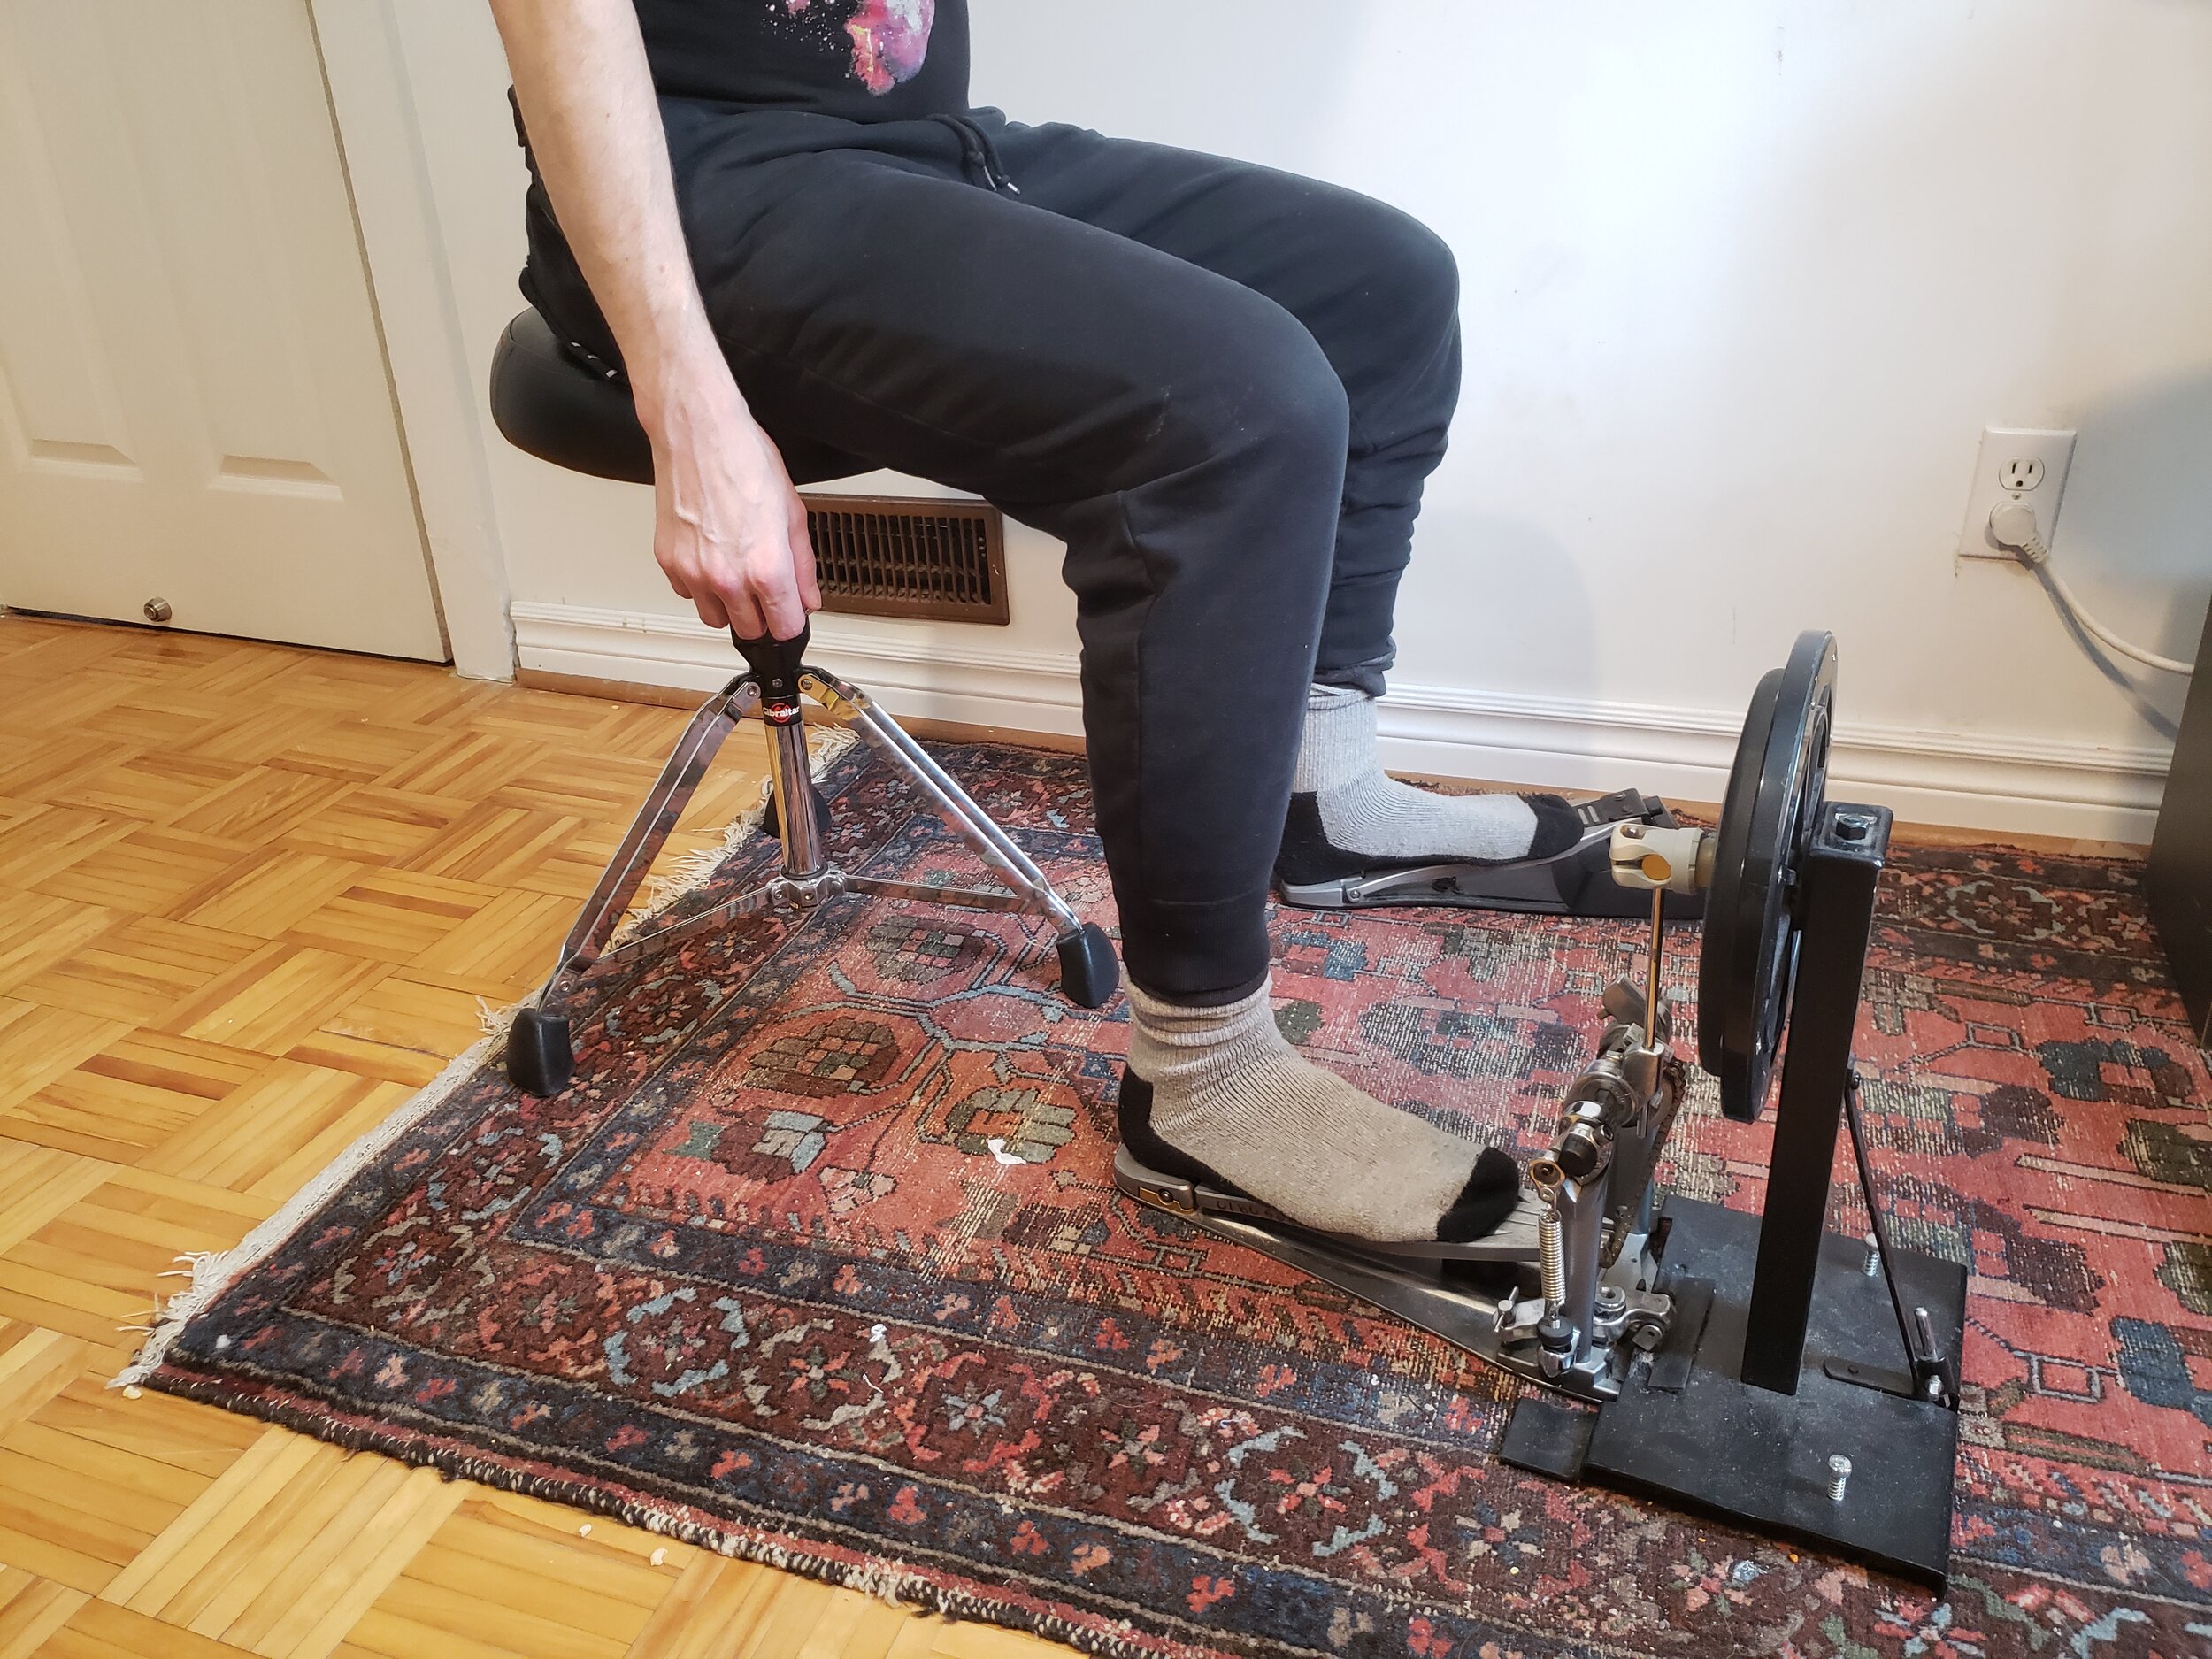
Now Place the snare drum in between your knees. Make small adjustments to your pedal placement if necessary, to make room for the snare drum stand.

Next, let’s nail down our ideal pedal placement, snare drum stand placement, and throne height. (We’ll deal with the height of the snare drum in another step.)
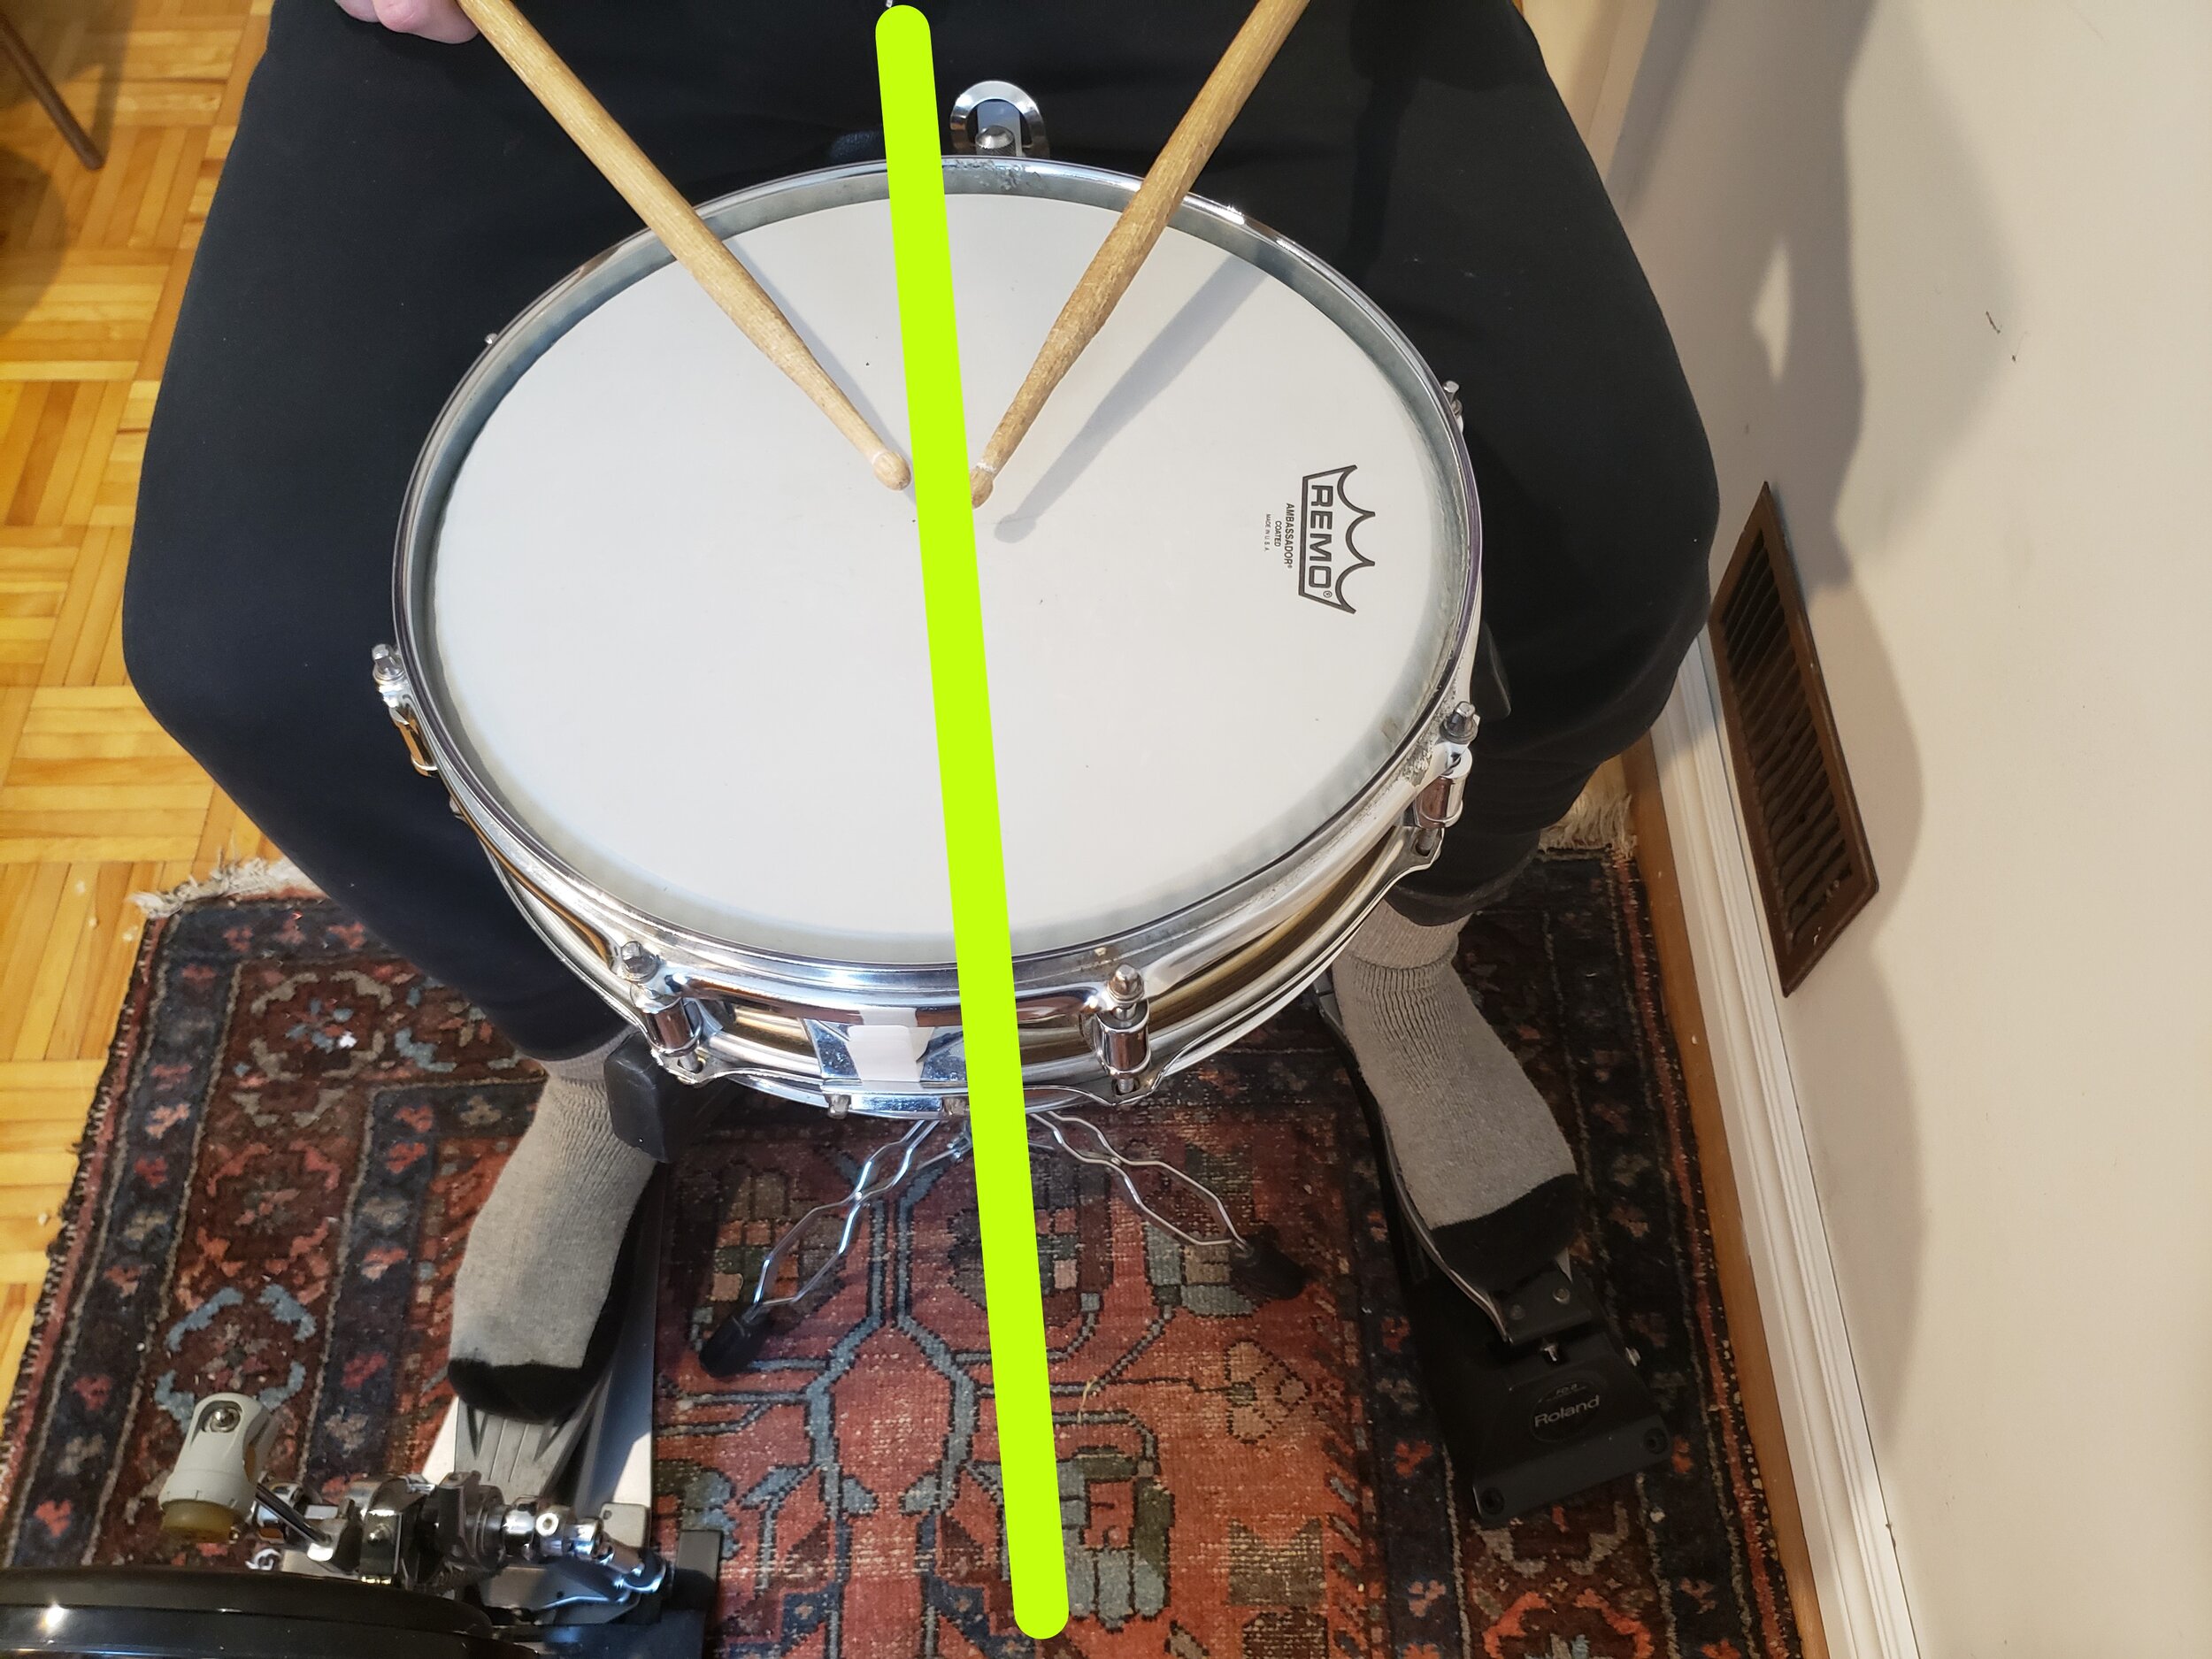
If you’re sitting on the throne, when you look down, your view of your legs, feet, snare drum and pedals should be symmetrical, with the line of symmetry extending from the center of your body, and passing through the center of the snare drum. The snare drum will be the focal point of your whole set up.
You don’t need your sticks yet, but I included them in these pictures to highlight the symmetry.

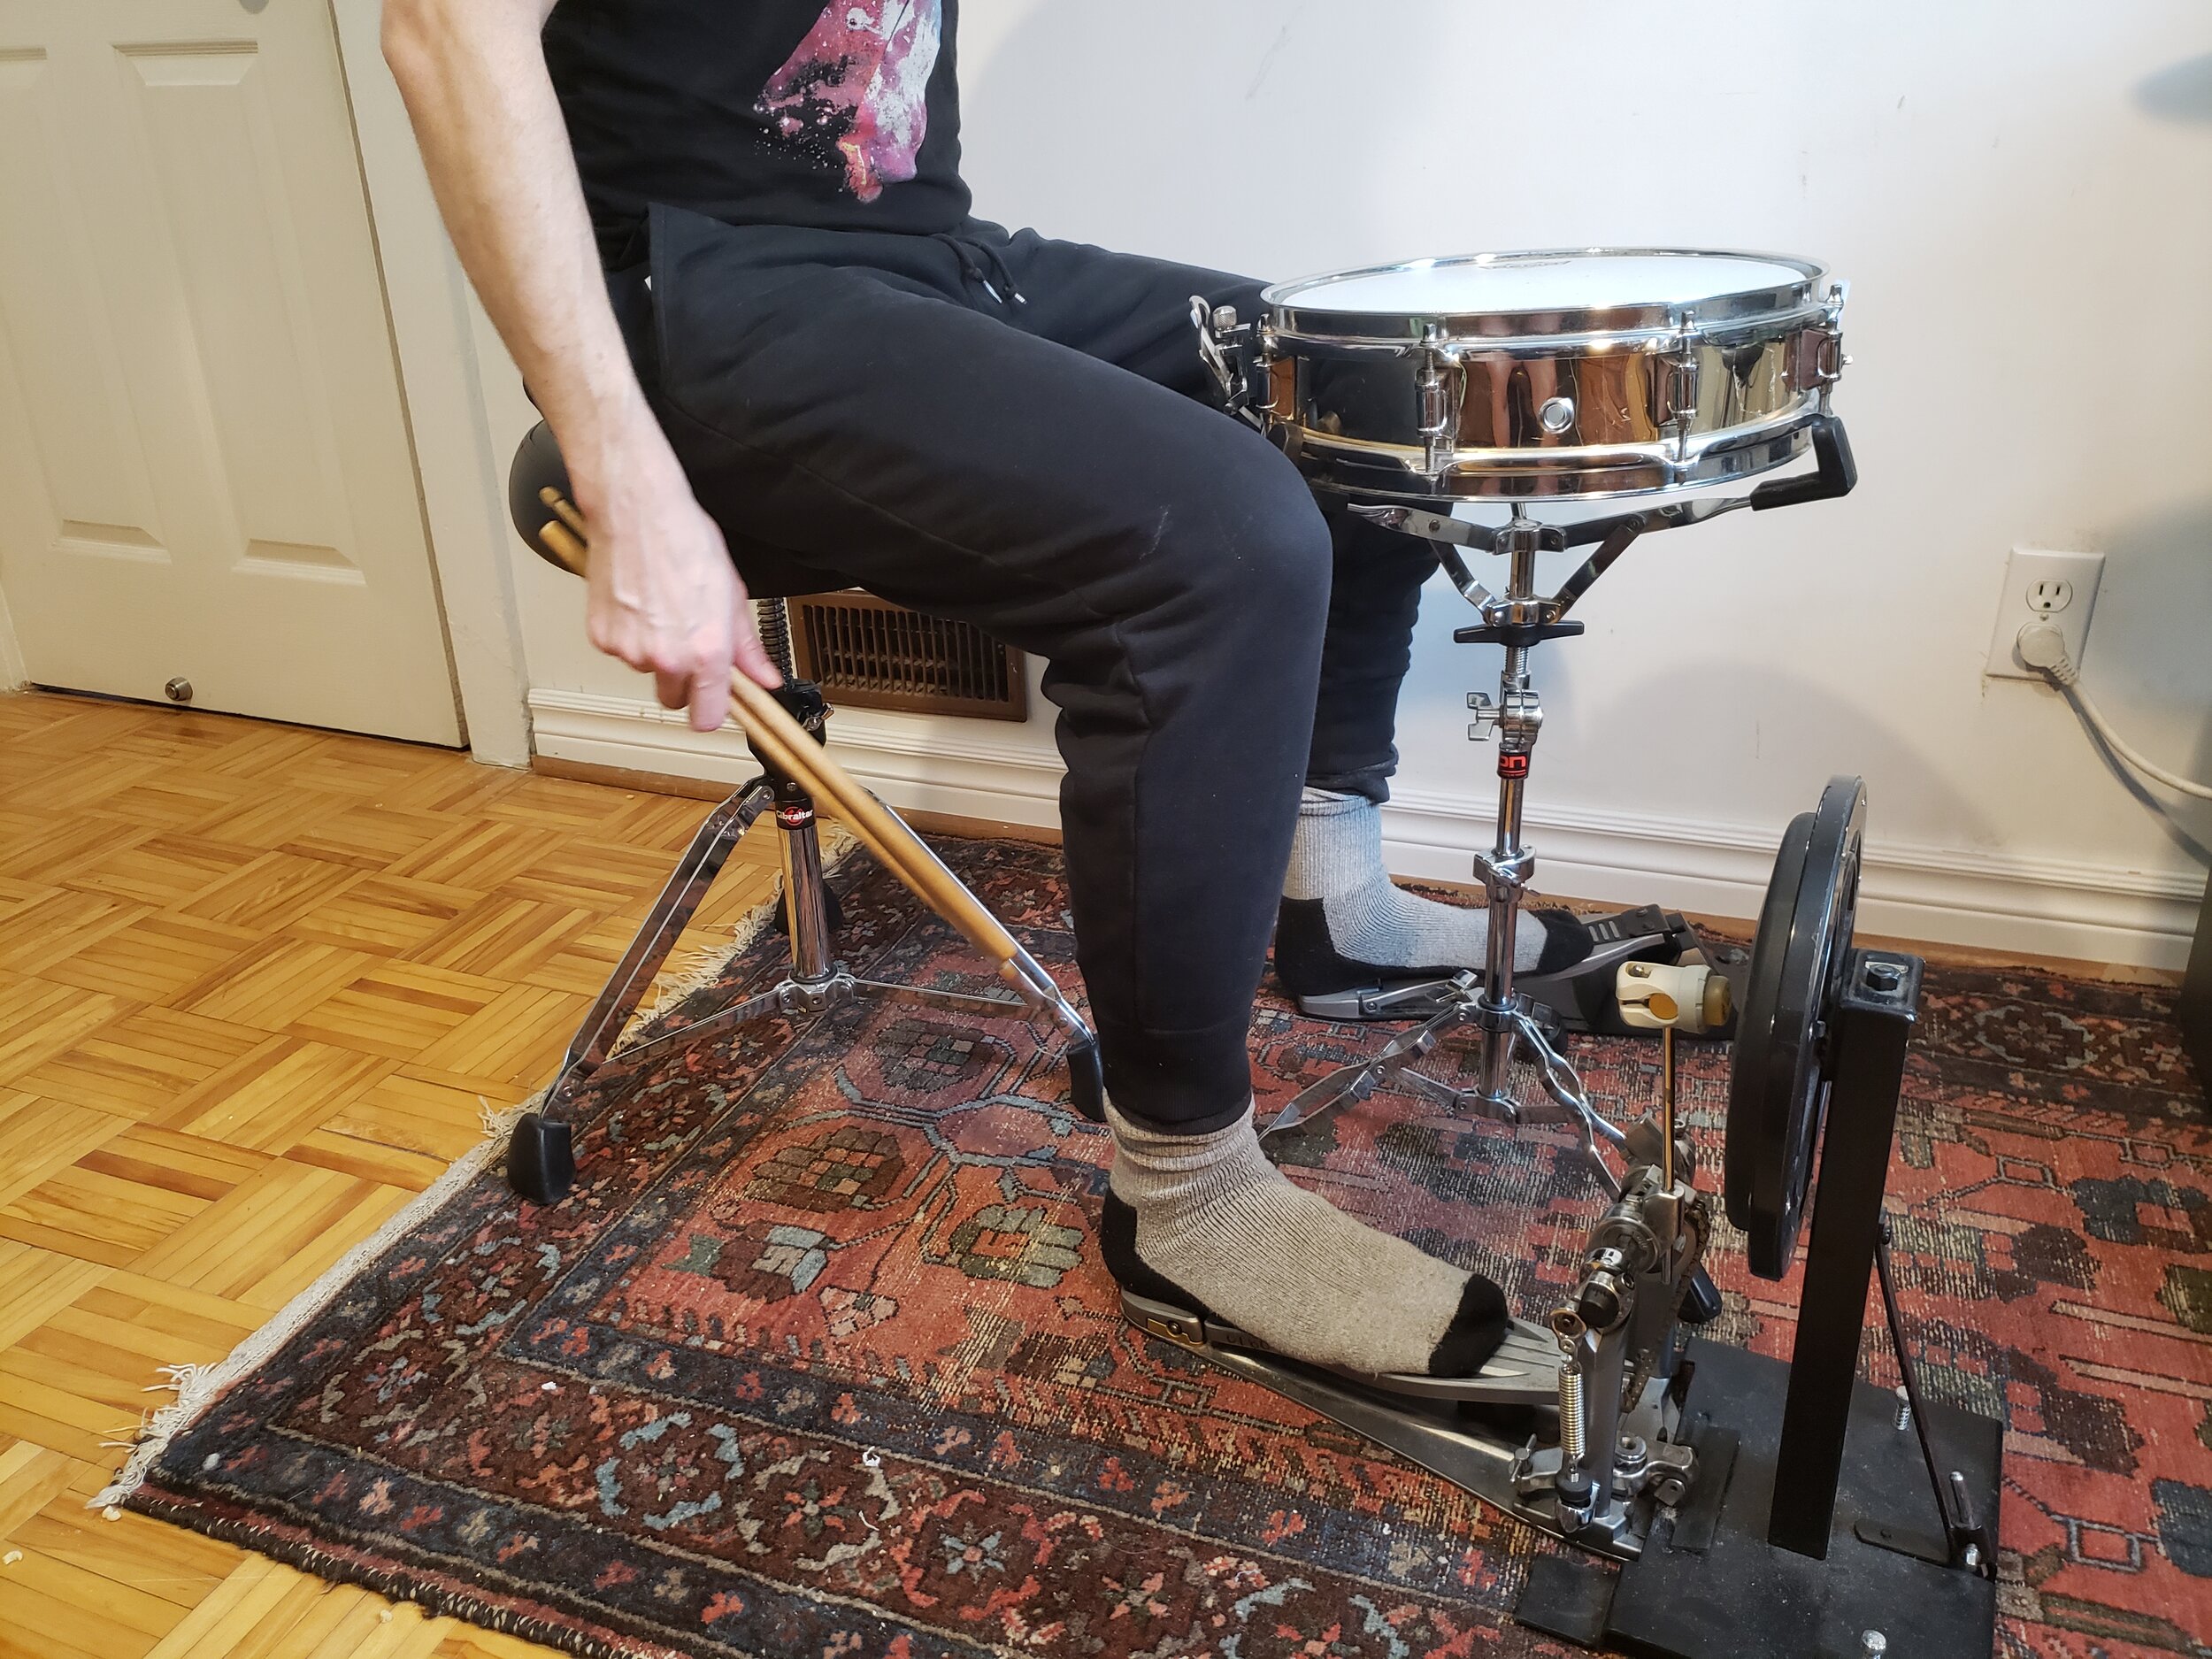
Now, if you were to view yourself from the side, you should be able to see that your hips are higher than your knees, and that your ankles are directly under your knees.

Some drummers like to sit up very high, with an extreme downward angle of the thigh. And others like to sit with just a very slight downward angle of the thigh. Both extremes, and everything in between, can work fine, and it’s really just down to personal preference. Personally, I sit with my hips rather low, so I don’t think you’d want to be much lower than this.
So now we should have our throne, pedals and snare stand correctly placed on the floor, relative to each other. And we should have a reasonable height set for our throne, as well. Next it’s time to deal with the snare drum height and angle.
Although many people like to have their snare drum tilted towards them, it’s best to keep the drum as flat as possible. This is because we want to strike the drum in a way where the angle of the stick is as close to parallel to the drum as possible, which is important for achieving the desired quality of sound, and also for efficiency of technique. So let’s make sure we have our drum flat. (In the example images, the snare drum, unfortunately, has a very slight tilt, because the drum isn’t quite sitting evenly in the stand!)
To find the best height for our snare drum, we first need to find our natural playing position. Put your sticks in your hands and let them hang down.
Then lift your sticks up and in front of you, keeping your elbows more or less in the same location by your sides. Have your sticks pointing straight out in front of you, (side view) but angled in towards each other (overhead view.)

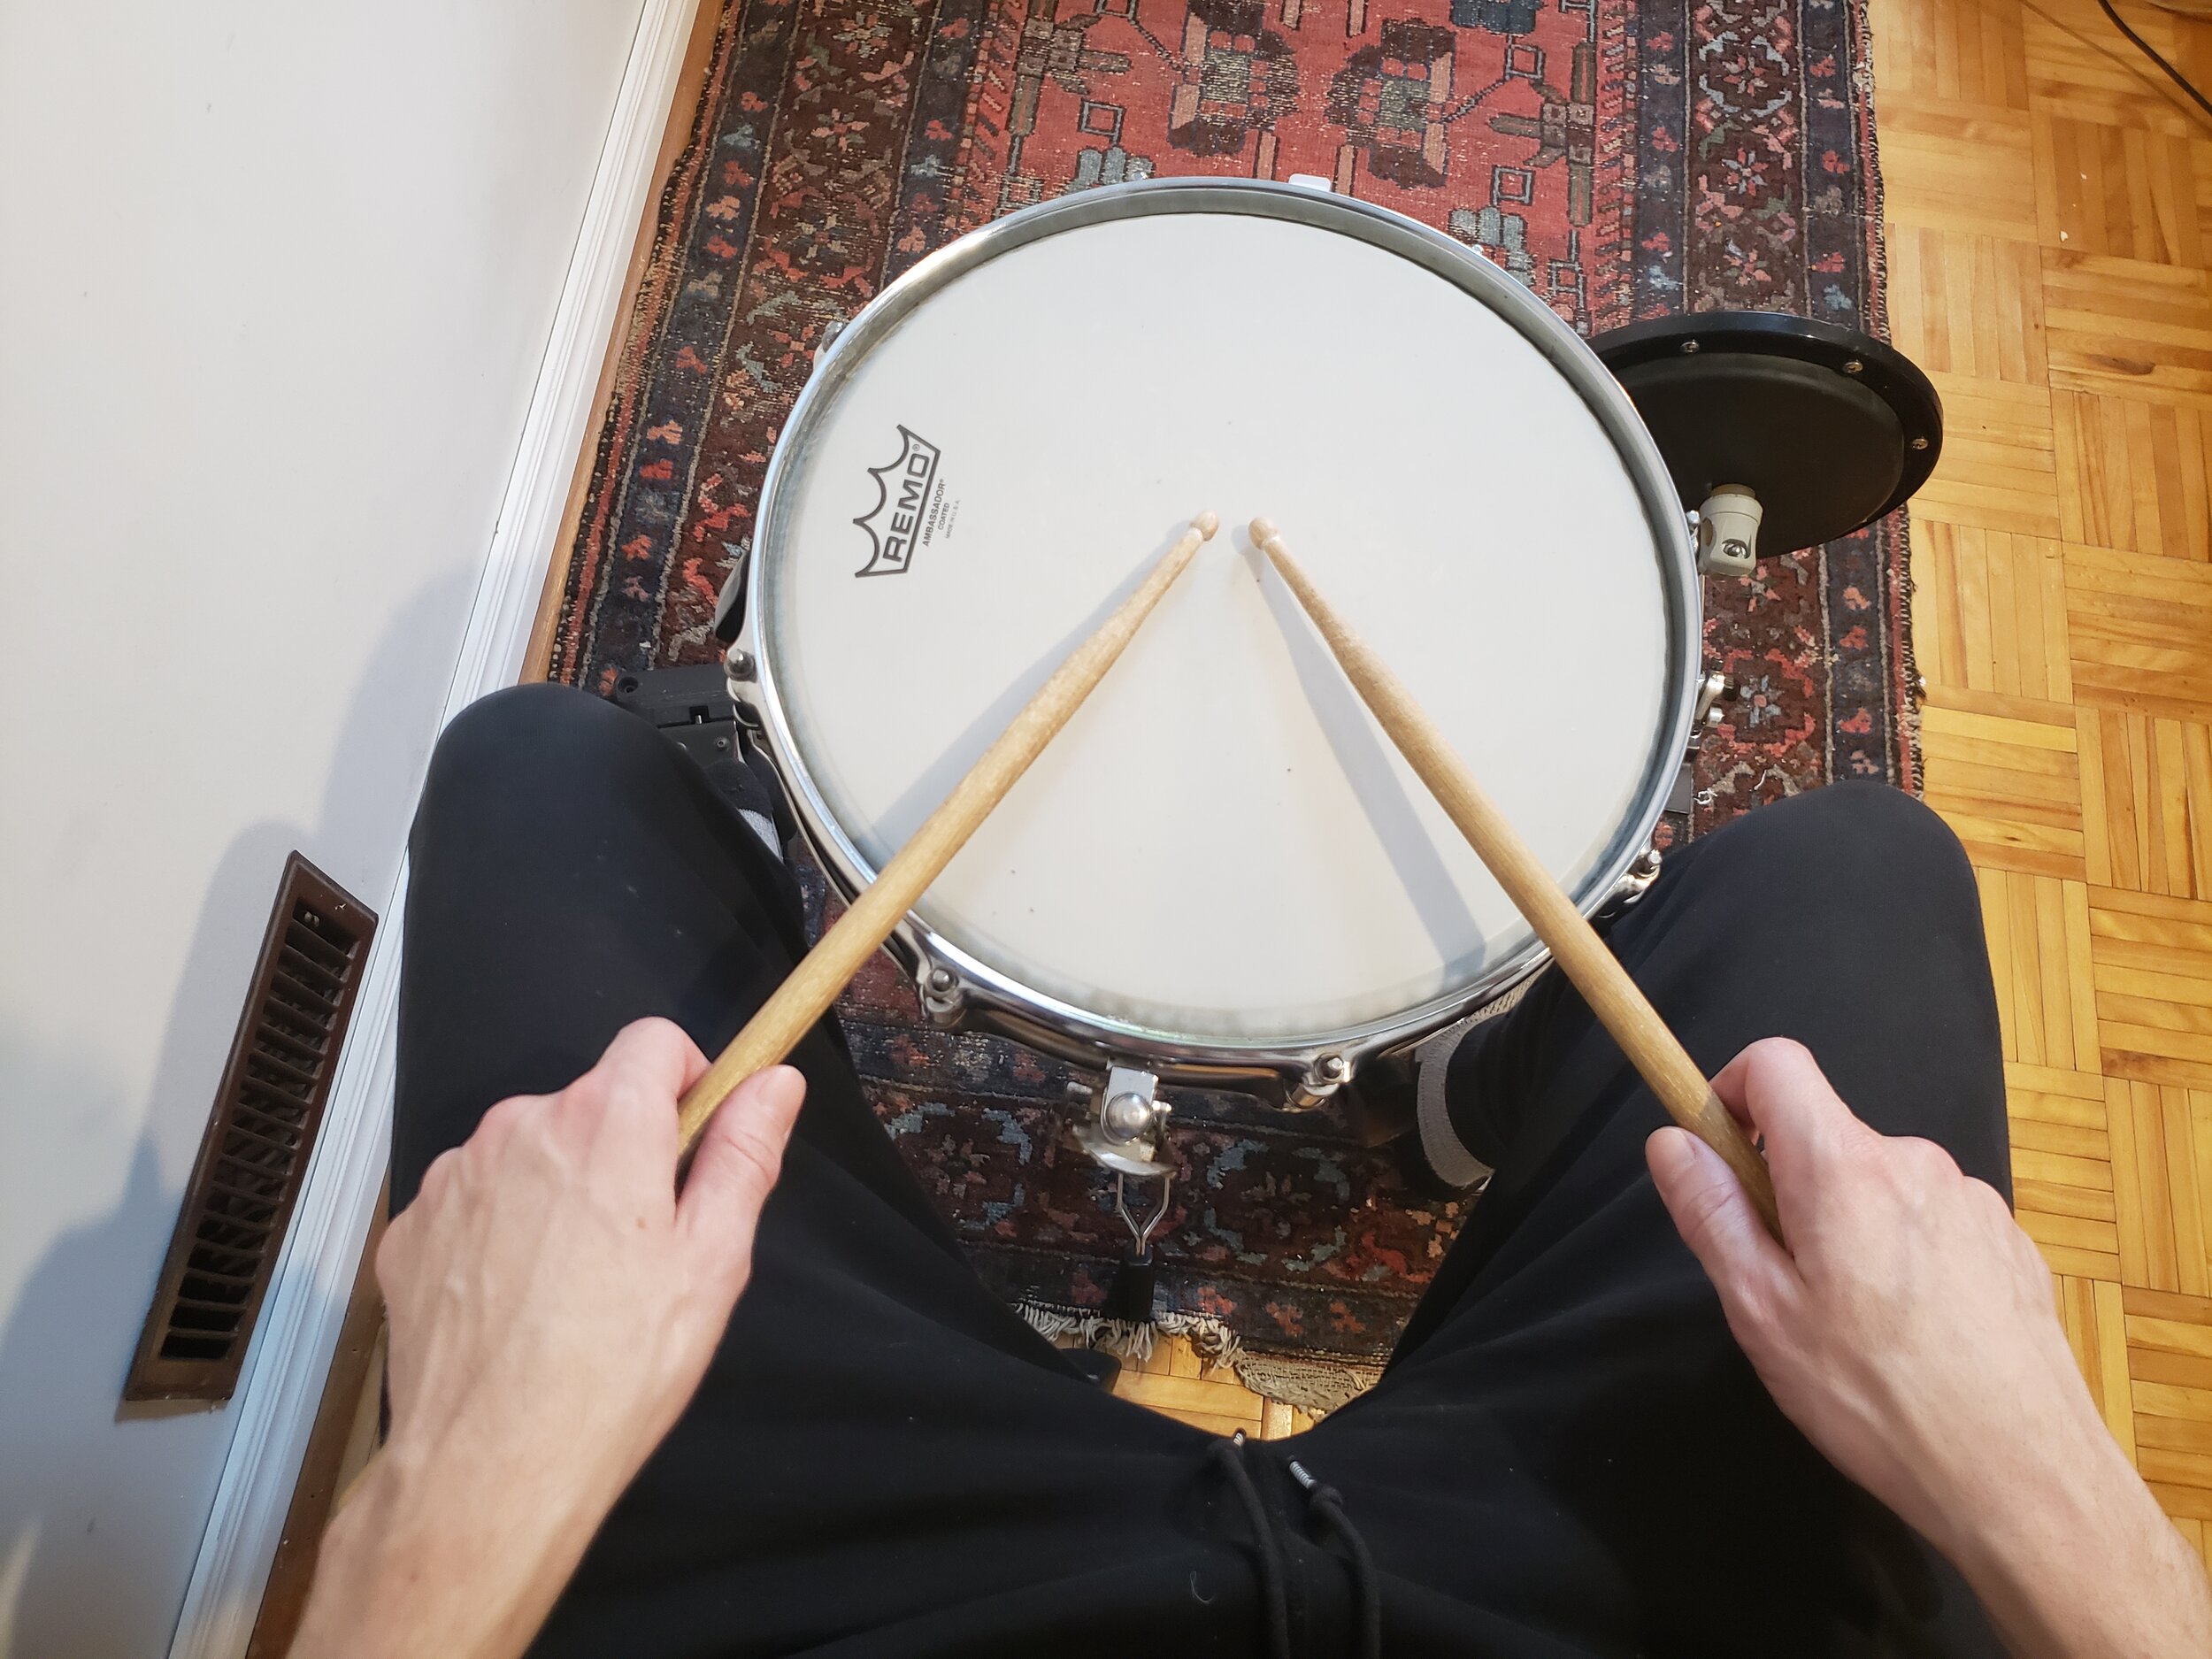
Set your snare drum so that the center of the drum is just below the beads of your sticks, in your natural playing position.
Next we’re going to place the floor tom to the outside of our right leg. Again, we just want to make sure we have a little bit of space between the leg and the edge of the drum–as close to the leg as we can get without worrying that our leg is going to hit or rub up against the snare drum or the floor tom. If you were to rotate right your arm out to your right over the floor tom, the bead of the stick should be just over the center of the drum, without your elbow having to move forwards or backwards. Move the drum closer or further away to compensate. If you reach over for the floor tom with your left hand, you’ll need to move your elbow inward, in front of your body.
I hope this guide has been helpful for you. If you’ve made it this far, please consider signing up for drum lessons! I teach in-person lessons in Toronto, Canada, but I also offer online lessons for those who live out-of-area. Contact me for a FREE TRIAL LESSON using the form below.